

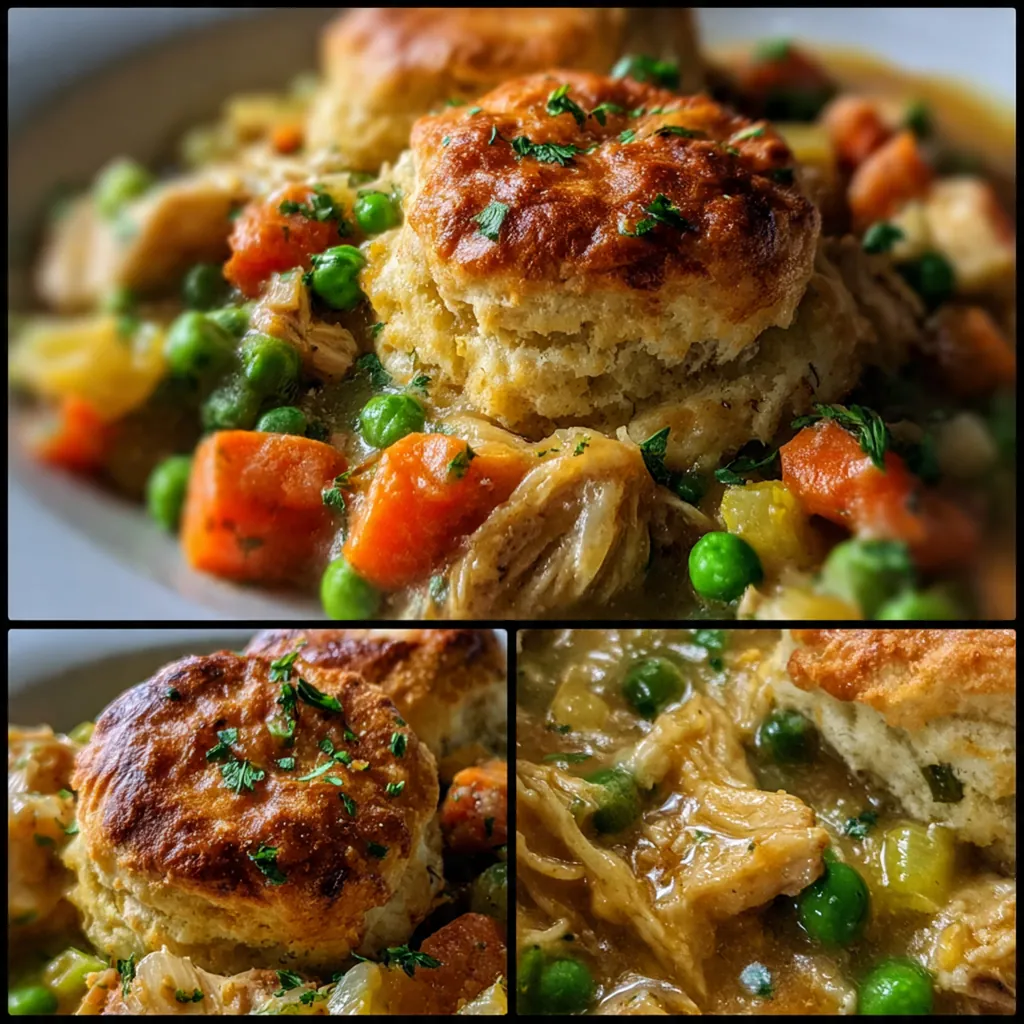
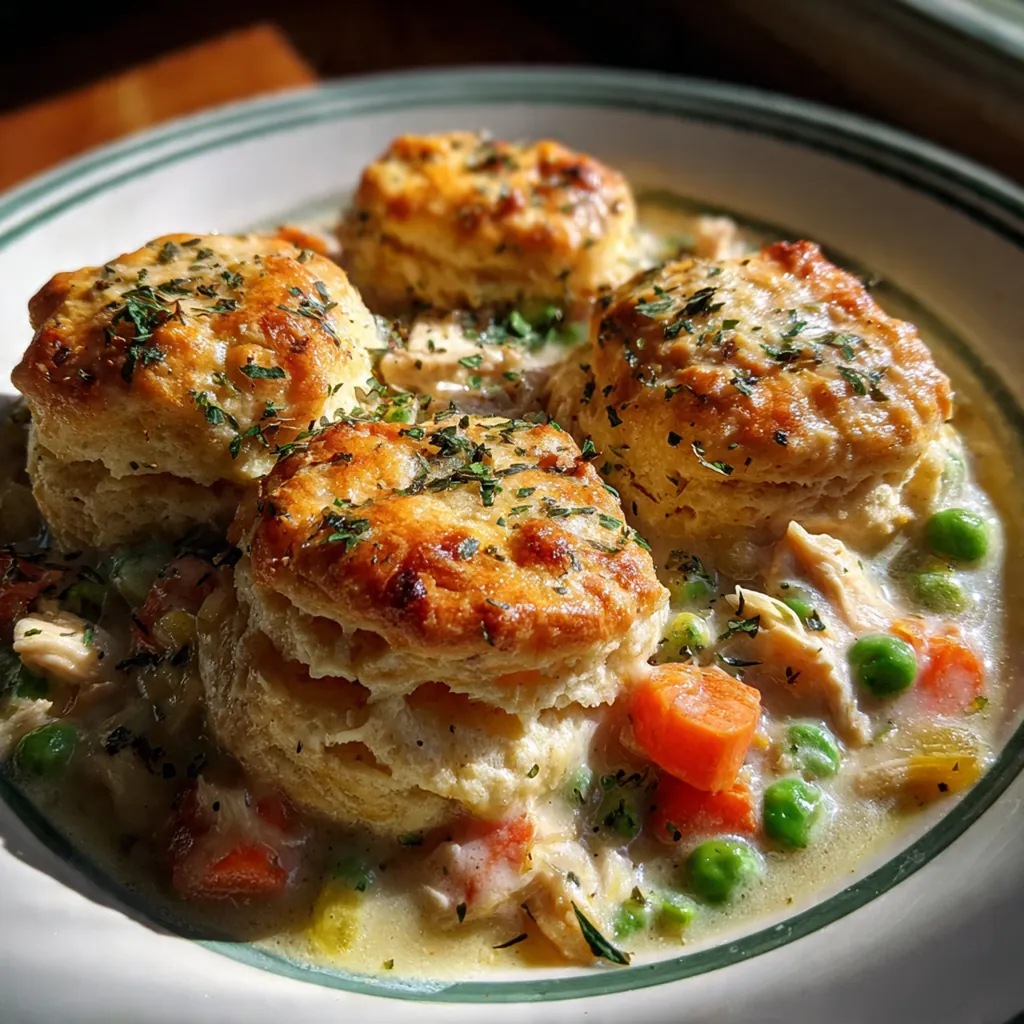
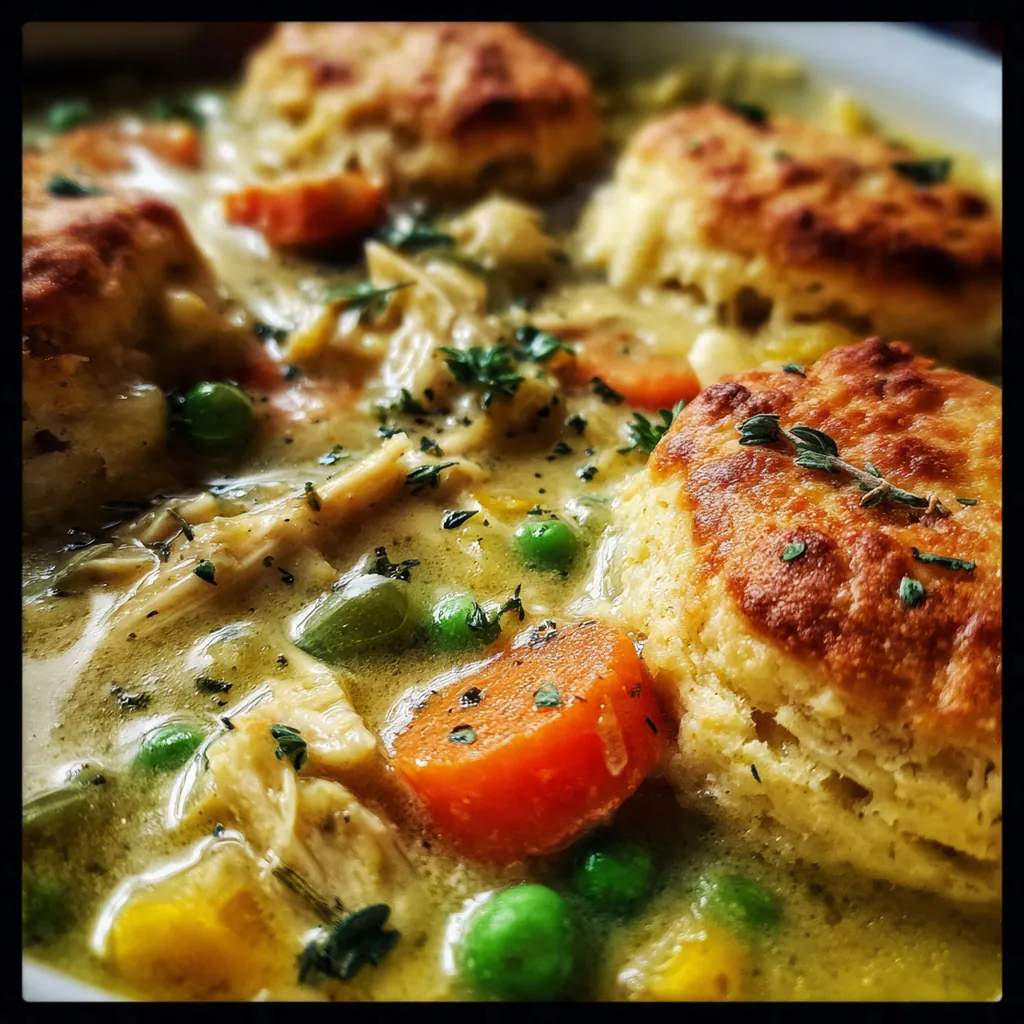
This biscuit chicken pot pie has been a weeknight hero in my kitchen for years. It’s the ultimate comfort food that combines a creamy chicken and vegetable filling with fluffy, golden biscuits baked right on top. As an American classic, it’s a hearty one-pan meal that’s perfect for family dinners. You’ll love how the homemade biscuits soak up the savory sauce, making every bite cozy and satisfying. It’s easier than traditional pie crust but just as delicious, and it comes together in under an hour.
Why You'll Love This Recipe
- One skillet means minimal cleanup and more time with your family
- Fluffy, golden biscuits soak up every bit of the creamy chicken filling
- It’s a balanced meal with tender chicken and colorful vegetables in every bite
- This cozy twist on pot pie is a crowd-pleaser that always gets requested
- I’ve made this for potlucks and weeknight dinners alike, and it never fails to disappear fir…
Ingredients You’ll Need
- Unsalted butter: for sautéing vegetables and creating a rich roux; it lets you control the saltiness of the dish.
- Yellow onion: diced for sweet, aromatic base that builds depth of flavor in the filling.
- Carrots: peeled and diced for sweetness and color; they soften perfectly in the sauté.
- Celery: diced for earthy crunch and classic pot pie flavor; it balances the sweetness of the carrots.
- All-purpose flour: used to thicken the filling into a luscious, creamy sauce that coats every ingredient.
- Chicken broth: forms the savory liquid base of the filling; use homemade or low-sodium for best flavor.
- Whole milk: adds creaminess and richness to the sauce, creating a velvety texture.
- Cooked chicken: shredded or diced for hearty protein; rotisserie chicken saves time and adds flavor.
- Frozen peas: stirred in at the end for bright color and sweet pops of flavor that stay vibrant.
- Dried thyme: an aromatic herb that gives the filling its classic, comforting savory note.
- Salt: enhances all the flavors; season to taste after adding the broth and milk.
- Black pepper: adds a subtle heat and complexity to the creamy filling.
- Self-rising flour: the key to fluffy, tender biscuits that rise beautifully without extra leavening.
- Cold unsalted butter: cubed and cut into the flour for flaky, layered biscuit texture; keep it cold.
- Buttermilk: the tangy liquid that brings the biscuit dough together and promotes a tender crumb.
- Fresh parsley: optional garnish for a fresh, colorful finish that brightens up the rich dish.
How to Make It
Preheat Your Oven and Skillet:
Start by preheating your oven to 400°F so it’s perfectly hot when you need it. I use a large cast iron skillet for this because it retains heat beautifully and goes straight from stovetop to oven. If you don’t have one, a Dutch oven or any oven-safe pan will do the trick.
Sauté the Aromatics:
Melt the butter over medium heat until it’s foamy, then add the diced onion, carrots, and celery. Sauté them, stirring occasionally, until they’re softened and fragrant, which takes about 5-7 minutes. This step builds the foundational flavors for your filling, so don’t rush it – you want the vegetables to be tender but not browned.
Build the Roux:
Sprinkle the all-purpose flour over the softened vegetables and stir constantly for a full minute. Cooking the flour eliminates the raw taste and ensures your sauce thickens properly without being gritty. You’ll see the mixture become pasty and coat the vegetables evenly.
Whisk in the Liquids:
Gradually whisk in the chicken broth and milk, making sure to incorporate the flour evenly to avoid lumps. Bring the mixture to a gentle simmer, stirring frequently, until it thickens into a creamy sauce. This usually takes about 5 minutes, and you’ll know it’s ready when it coats the back of a spoon.
Incorporate Chicken and Peas:
Stir in the cooked chicken, frozen peas, dried thyme, salt, and pepper. Let it simmer for 2-3 minutes until everything is heated through. Taste and adjust seasoning if needed – I often add a pinch more thyme or pepper here. Then remove from heat.
Prepare the Biscuit Dough:
While the filling simmers, combine self-rising flour and cold cubed butter in a bowl. Use a pastry cutter or your fingers to cut the butter into the flour until it resembles coarse crumbs. This creates pockets of fat that make the biscuits flaky when baked, so take your time here.
Bring the Dough Together:
Pour in the buttermilk and stir until just combined. The dough will be shaggy and lumpy, which is exactly what you want. Overmixing leads to tough biscuits, so stop as soon as no dry flour remains. I like to use a fork for this to keep it light.
Top the Filling with Dough:
Drop spoonfuls of the biscuit dough evenly over the hot filling in the skillet. The dough doesn’t need to be perfect; irregular shapes give a homemade charm and ensure even baking. Leave some gaps for the filling to peek through – it’ll bubble up beautifully.
Bake Until Golden Brown:
Bake in the preheated oven for 15-20 minutes until the biscuits are golden brown and the filling is bubbly around the edges. Let it cool for 5 minutes before serving to allow the filling to set slightly. This waiting period is tough, but it’s worth it for the perfect slice.
You Must Know
- Cold butter is non-negotiable for biscuits that rise high and stay flaky
- Don’t overmix the biscuit dough – lumps and shagginess are what you want
- Let the filling cool slightly before adding dough to prevent sinking
- This dish is best enjoyed fresh from the oven when biscuits are crisp
- Trust me, taking that extra minute to let the filling cool makes all the difference in biscu…
Storage Tips
Store any leftover biscuit chicken pot pie in an airtight container in the refrigerator for up to three days. The biscuits will soften a bit from the steam, but you can reheat individual portions in a 350°F oven for about 10-15 minutes until warmed through to revive some texture. I don’t recommend freezing the assembled pie as the biscuits can become soggy, but you can freeze the filling separately for a quick future meal. Always let it cool completely before storing to keep everything fresh. If you have leftover biscuits, you can store them separately in a bread bag to maintain their texture.
Ingredient Substitutions
If you don’t have self-rising flour, make your own by mixing two cups of all-purpose flour with one tablespoon of baking powder and half a teaspoon of salt. No buttermilk? Stir a tablespoon of lemon juice or white vinegar into a cup of milk and let it sit for five minutes. For the chicken, leftover roasted turkey or even canned chicken works in a pinch, though rotisserie chicken adds the best flavor. To make it dairy-free, use plant-based butter and your favorite unsweetened milk alternative, though the biscuits might be slightly less rich. For gluten-free, use a 1:1 gluten-free flour blend and ensure your baking powder is gluten-free.
Serving Suggestions
This biscuit chicken pot pie is a complete meal on its own, but I love pairing it with a simple green salad dressed with a tangy vinaigrette to cut through the richness. Steamed green beans or roasted broccoli also make excellent sides that add color and nutrients. For a festive touch, a spoonful of cranberry sauce on the side adds a sweet and tangy contrast that complements the savory filling perfectly. In the fall, I sometimes serve it with a side of mashed sweet potatoes for a cozy feast. It’s hearty enough to stand alone, but these sides round out the dinner table beautifully.
Cultural Context
Chicken pot pie is a beloved American comfort food with roots that trace back to colonial times, when settlers adapted European meat pies using local ingredients. The biscuit-topped version is a Southern twist, where baking powder biscuits were a staple from the 19th century. This dish embodies the heart of home cooking – it’s practical, nourishing, and meant to feed a family with simple, wholesome components. You’ll find variations across the country, but the combination of creamy filling and fluffy biscuit topping is a testament to the ingenuity of American home cooks making the most of what they have. It’s a dish that speaks to warmth and hospitality, often served at gatherings and Sunday dinners. I love how it represents resourcefulness and comfort in every bite.
Pro Tips
- Cube your butter and chill it before making the biscuit dough for maximum flakiness
- Rotisserie chicken is your best friend here for deep flavor and zero prep
- If your filling seems too thick, add a splash more broth before baking
- Always use an oven-safe skillet so you can go from stovetop to oven seamlessly
- I keep a rotisserie chicken in my fridge just for this recipe – it’s that good.
Frequently Asked Questions
You can make your own self-rising flour for this biscuit chicken pot pie. For every cup of all-purpose flour, mix in 1 ½ teaspoons of baking powder and ¼ teaspoon of salt. The recipe calls for 2 cups, so you’d need 3 teaspoons baking powder and ½ teaspoon salt total.
Yes, you can prepare the creamy chicken filling a day ahead and store it covered in the fridge. When ready to bake, reheat the filling slightly, top with the biscuit dough made fresh, and extend the baking time by 5-10 minutes since you’re starting with a cold base.
For fluffy biscuits on your pot pie, make a quick buttermilk substitute. Add 2 teaspoons of white vinegar or lemon juice to ¾ cup of regular milk and let it sit for 5 minutes before using. This tangy acid is crucial for reacting with the baking powder in the self-rising flour.
The pie is done when the creamy filling is bubbling vigorously around the edges and the biscuit topping is puffed and golden brown, which typically takes 25-30 minutes. An inserted toothpick in the center of a biscuit should come out clean.
This hearty American main dish is a complete meal in one pan. For a light accompaniment, a simple green salad with a tangy vinaigrette or some steamed green beans help balance the richness of the creamy filling and biscuits.