

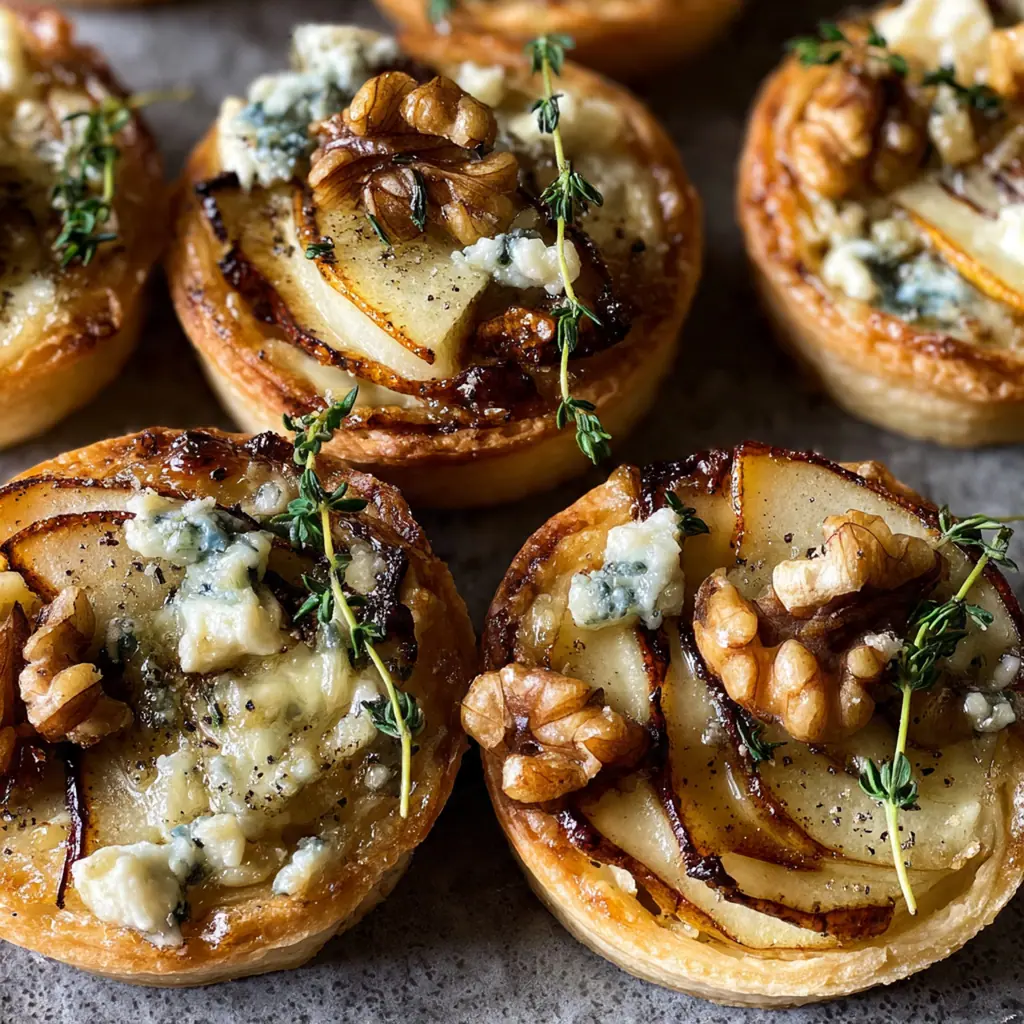
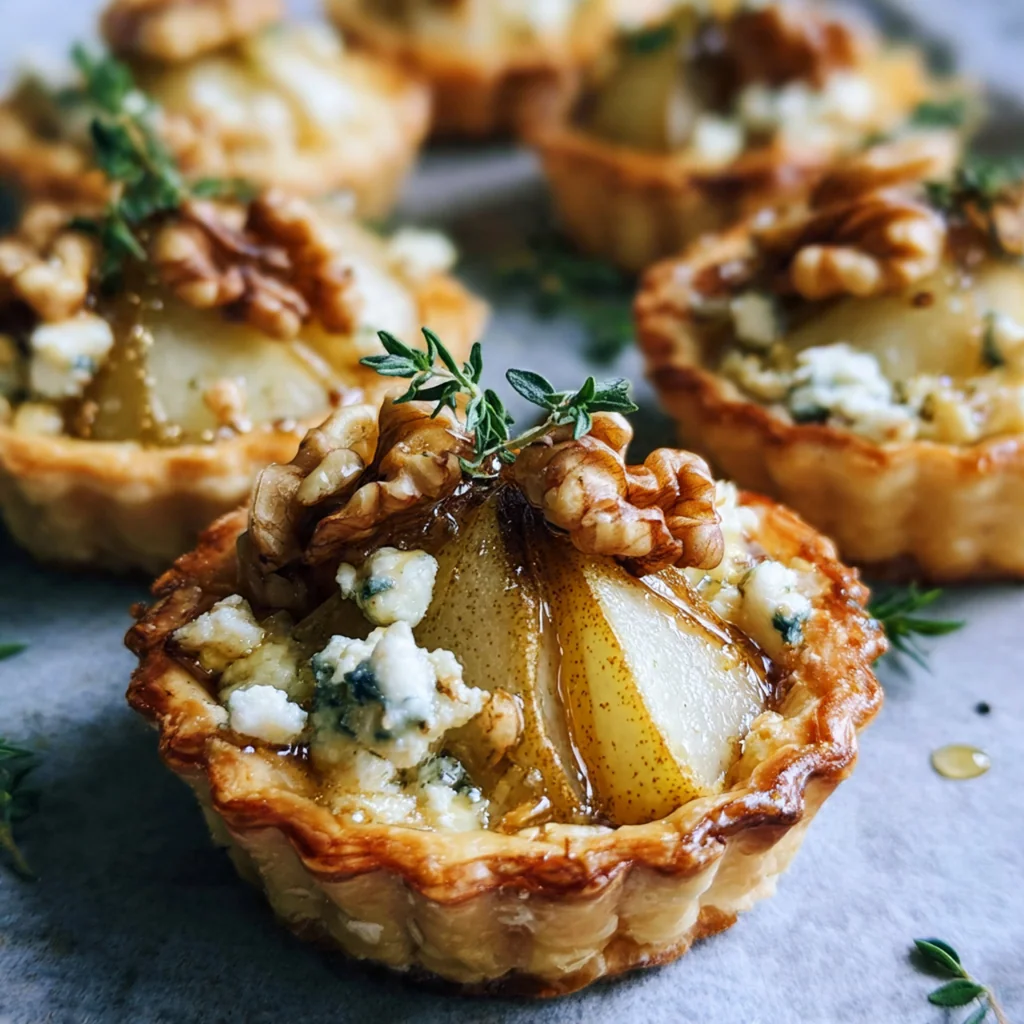
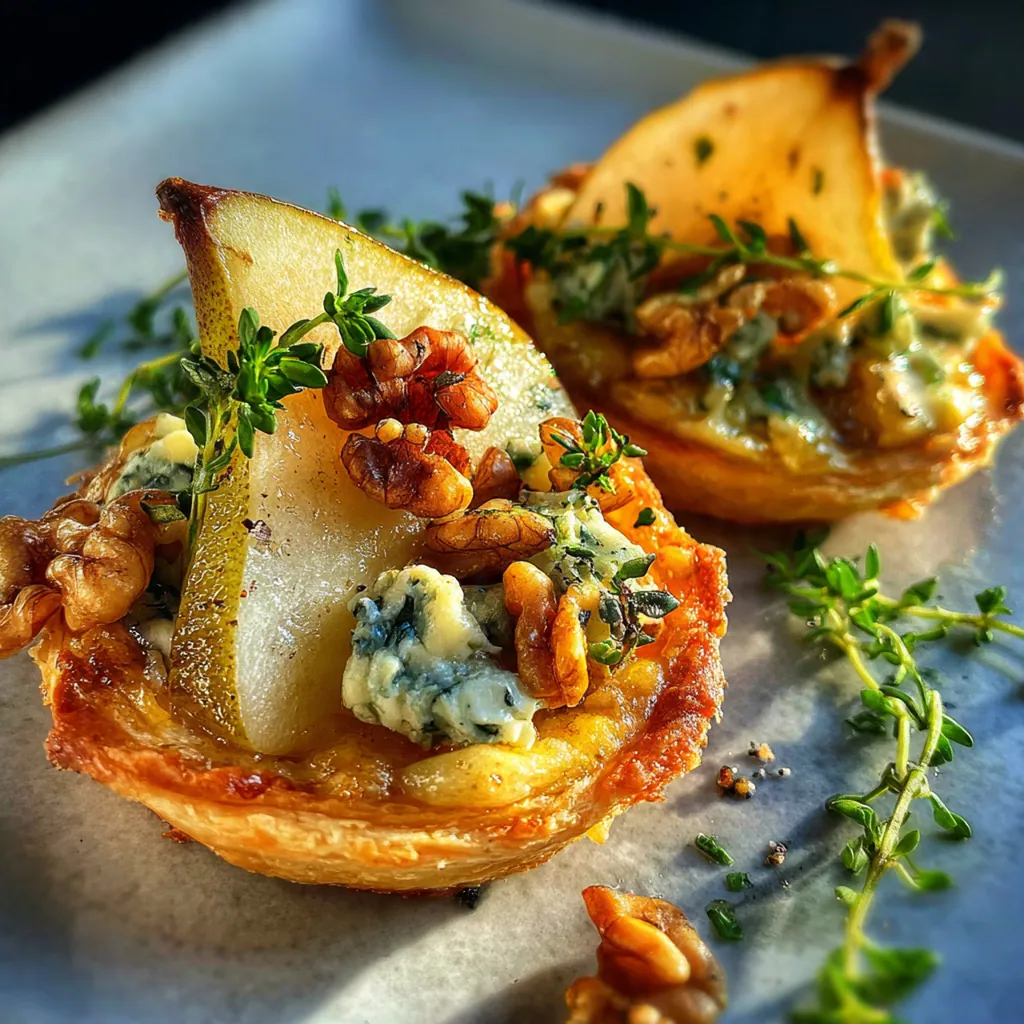
Blue Cheese and Pear Tartlets have become my secret weapon for last-minute entertaining, blending sweet ripe pears and tangy cheese on a flaky puff pastry base. This French-inspired appetizer looks like you spent hours, but it comes together in under 40 minutes with minimal effort. I love how the flavors perfectly balance each other, creating something that feels both rustic and elegant. It’s the kind of dish that always earns compliments and disappears quickly from any party platter.
Why You'll Love This Recipe
- They look incredibly fancy but are surprisingly simple with store-bought pastry
- Sweet juicy pears and savory blue cheese create that perfect flavor balance you crave
- Ready in under 40 minutes which is ideal for last-minute guests or a cozy night in
- Easy to customize with your favorite nuts or whatever herbs you have on hand
- I make these for every holiday gathering and they’re always the first to go
Ingredients You’ll Need
- Frozen puff pastry: provides the flaky, buttery base that makes these tartlets so irresistible, and keeping it cold until baking is the secret to maximum lift.
- All-purpose flour: just a light dusting for your work surface prevents the pastry from sticking and makes rolling a breeze.
- Bosc pears: their firm texture holds up beautifully during baking and they offer a subtle sweetness that isn’t overly juicy.
- Blue cheese like Roquefort or Gorgonzola: brings that signature tangy punch that cuts through the pear’s sweetness, and a good crumble melts into creamy pockets.
- Walnuts: add a necessary crunch and toasty flavor that contrasts the soft pear and cheese perfectly.
- Honey: a light drizzle caramelizes slightly in the oven and ties all the sweet and savory elements together.
- Fresh thyme leaves: their earthy, slightly floral aroma lifts the whole dish and makes it taste wonderfully fresh.
- Freshly ground black pepper: a little sprinkle enhances every other flavor and adds a subtle warmth.
- Large egg: beaten and brushed on the pastry edges, it gives you that gorgeous, professional-looking golden brown finish.
- Unsalted butter: melted and brushed on after baking for an extra layer of richness and shine, though it’s optional.
- Fresh arugula: an optional garnish that adds a lovely peppery bite and a pop of green color.
- Balsamic glaze: another optional finish that adds a sweet-tart complexity with just a simple drizzle.
How to Make It
Preheat and Prepare Your Pan:
Start by preheating your oven to 400°F and lining a large baking sheet with parchment paper. This setup guarantees easy cleanup and prevents any sticking, so you can focus on assembling your blue cheese and pear tartlets without worry.
Roll and Cut the Pastry:
On a surface lightly dusted with flour, gently roll the thawed puff pastry out to an even 1/8-inch thickness. Then, use a sharp knife or a round cutter to create 12 equal squares or circles, placing them on your prepared baking sheet.
Dock and Egg Wash the Bases:
Take a fork and prick the centers of each pastry piece a few times. This simple step, called docking, prevents the middle from puffing up too much during baking. Then, lightly brush just the edges with the beaten egg for that perfect golden color.
Slice and Arrange the Pears:
Core your pears and slice them thinly, aiming for about 1/4-inch thick pieces. Arrange a few slices on each pastry base, making sure to leave a small border around the edges so the pastry can puff up and create a beautiful rim.
Add Cheese, Walnuts, and Seasonings:
Sprinkle the crumbled blue cheese and chopped walnuts evenly over the pear slices on each tartlet. Follow with a delicate drizzle of honey, then a scattering of fresh thyme leaves and a pinch of black pepper.
Bake to Golden Perfection:
Slide the baking sheet into your preheated oven and bake for 15 to 18 minutes. You’ll know they’re done when the pastry is puffed and deeply golden and the cheese is wonderfully melted.
Garnish and Serve Warm:
Let the tartlets cool on the sheet for about 5 minutes to let the flavors settle. If you’re using them, now’s the time to add that arugula garnish and a final artistic drizzle of balsamic glaze. Serve them warm for the best texture and taste.
You Must Know
- Use pears that are firm-ripe so they hold their shape during baking
- Keep the puff pastry cold right up until it goes in the oven for maximum flakiness
- Toasting the walnuts first unlocks a deeper, nuttier flavor
- A quick prick with a fork prevents the pastry centers from doming too high
- Let them cool for five minutes so the cheese sets a bit
Storage Tips
These blue cheese and pear tartlets are truly best enjoyed fresh from the oven when the pastry is at its peak crispness. If you do have leftovers, store them in an airtight container in the refrigerator for up to two days. To bring back some of that magic, reheat them in a 350°F oven for 5 to 7 minutes until the pastry crisps up again. I don’t recommend the microwave as it’ll make the base soggy, and freezing isn’t ideal because the pears can become too soft upon thawing.
Ingredient Substitutions
If Bosc pears aren’t available, Anjou or even a firm Bartlett pear will work just fine as long as they’re not too soft. You can swap the blue cheese for a strong goat cheese or even a creamy gorgonzola dolce for a milder flavor, and pecans or almonds make a great stand-in for the walnuts. Don’t have fresh thyme? A tiny pinch of dried thyme works, or try rosemary for a different herbal note. For a nut-free version, simply leave the walnuts out or add a sprinkle of pepitas for crunch, and for gluten-free, seek out a reliable gluten-free puff pastry brand.
Serving Suggestions
I love serving these warm blue cheese and pear tartlets as the star of a cocktail hour spread alongside a crisp, dry white wine like Sauvignon Blanc or a fun sparkling Prosecco. They also pair beautifully with a simple green salad dressed with a light vinaigrette for a more complete lunch or light dinner. For a bigger party board, add some cured meats, olives, and a bowl of marinated nuts to round everything out and let these little bites really shine.
Cultural Context
The combination of fruit, cheese, and pastry is a classic trope in French cuisine, speaking to a tradition of balancing rich, savory elements with natural sweetness. You can see this philosophy in everything from a rustic tarte tatin to a sophisticated cheese course served with poached pears and walnuts. These blue cheese and pear tartlets are a casual, modern take on that elegant pairing, perfect for informal gatherings yet rooted in a culinary heritage that celebrates contrasting textures and harmonious flavors on a single plate.
Pro Tips
- Toast your chopped walnuts in a dry pan for a few minutes to seriously boost their flavor
- If the pastry center puffs too much, just press it down gently with a fork halfway through b…
- Let the tartlets cool slightly before serving so the molten cheese doesn’t burn anyone’s mouth
- A pastry brush makes applying the egg wash neat and easy for that professional look
- I always make a few extra because they disappear so fast
Frequently Asked Questions
Firm Bosc pears are ideal for these tartlets. They hold their shape beautifully during baking and offer a sweet, slightly honeyed flavor that pairs wonderfully with the bold blue cheese. Just make sure they’re ripe but still firm to the touch for easy slicing.
Absolutely! You can assemble the tartlets up to a day in advance, cover them tightly, and refrigerate until you’re ready to bake. You can also freeze the unbaked tartlets on a sheet pan, then transfer to a freezer bag. Bake from frozen, adding a few extra minutes to the cook time.
If blue cheese is too strong, you can use a milder crumbled cheese like goat cheese (chèvre) or feta. For a similar tangy profile without the blue veins, a good quality aged gouda or sharp white cheddar, grated, would also work wonderfully with the pears.
The tartlets are done when the puff pastry is puffed and a deep golden brown around the edges, which typically takes 16-18 minutes in a preheated oven. The cheese will be melted and bubbly, and the pear slices will be tender and slightly caramelized at the edges.
These elegant tartlets pair beautifully with a crisp green salad dressed in a light vinaigrette, a glass of dry white wine or sparkling cider, or other French-inspired bites like pâté or olive tapenade. They’re a perfect start to a dinner party or a lovely addition to a holiday charcuterie board.