

These Classic Homemade Waffles are my family’s favorite weekend tradition, a simple recipe that always delivers that perfect combination of crispy and fluffy. The American breakfast staple feels like a warm hug on a plate, and making them from scratch is far more rewarding than any boxed mix ever could be. You’ll be amazed at how a few basic pantry ingredients transform into something so spectacular. It’s a recipe I’ve made a thousand times and still look forward to every single batch.
Why You'll Love This Recipe
- That ideal golden, crisp exterior and tender, fluffy interior
- It’s ready in under 30 minutes for a weekend breakfast or brunch
- Far superior in flavor and quality to any boxed mix you can buy
- Easy to customize with whatever add-ins you have on hand
- You’ll never want a frozen waffle again
Ingredients You’ll Need
- All-purpose flour: provides the main structure for your waffles, use a good quality brand and spoon and level it into your measuring cup for the most accurate results.
- Granulated sugar: adds just the right hint of sweetness to complement the toppings without making the waffles overly sweet.
- Baking powder: this is your essential leavening agent that creates all those beautiful air pockets for the classic fluffy interior texture.
- Salt: a must for balancing all the other flavors and making the sweetness pop, don’t ever skip it in your batter.
- Large eggs: they act as a binder and help with the rise and structure, always bring them to room temperature for the smoothest batter.
- Whole milk: the higher fat content here contributes to a rich flavor and helps achieve that perfect golden brown crust.
- Unsalted butter: melted and cooled, it gives the waffles their signature rich flavor and helps with the crisp texture.
- Pure vanilla extract: this simple addition provides a warm, aromatic background note that elevates the entire flavor profile.
How to Make It
Preheat Your Waffle Iron:
Go ahead and preheat your waffle iron according to its instructions, usually to a medium-high setting around 375°F. Most have a light that tells you when they’re ready. This ensures a hot, consistent cooking surface from the very first waffle for maximum crispiness.
Mix Your Dry Ingredients:
In a large bowl, whisk together the flour, sugar, baking powder, and salt. You want to do this thoroughly so the leavening is evenly distributed and there are no unpleasant pockets of baking powder. A few extra whisks here makes all the difference.
Combine Your Wet Ingredients:
In a separate medium bowl, lightly beat the eggs with a whisk just until they’re combined. Then pour in the milk, melted butter, and vanilla. Whisk it all together until it’s smooth and fully incorporated. This two-bowl method is key for texture.
Combine Wet and Dry:
Pour the wet mixture into the bowl of dry ingredients. Using a spatula, stir gently until you just barely see no more streaks of flour. A slightly lumpy batter is perfectly fine and actually desired, as overmixing leads to tough, chewy waffles.
Grease and Pour the Batter:
Lightly grease the hot iron with non-stick spray or a brush of melted butter. Pour the batter onto the center, using about a half cup for a standard round waffle. Close the lid firmly and don’t peek right away.
Cook Until Golden and Crisp:
Let the waffle cook for about three to five minutes, or until the steam stops escaping from the sides of the iron. This visual cue is your best bet for knowing when it’s perfectly done. The waffle should be a deep golden brown.
Remove and Keep Crisp:
Carefully lift the waffle out with a fork and immediately place it on a wire rack. This allows air to circulate and prevents the bottom from getting soggy from trapped steam. Avoid stacking them while you finish the rest of the batter.
Repeat and Serve:
Continue with the remaining batter, giving the iron a light re-grease between batches if it’s not non-stick. Serve your homemade waffles warm right off the iron with all your favorite toppings for the ultimate breakfast experience.

You Must Know
- Do not overmix your batter or the waffles will be tough
- Letting the batter rest for five minutes yields extra crisp edges
- A hot, properly preheated waffle iron is non-negotiable for success
- Place cooked waffles on a wire rack, not a plate, to keep them crisp
- It’s a simple rule I swear by
Storage Tips
These homemade waffles are absolutely best served fresh and hot. For any leftovers, let them cool completely on that wire rack, then pop them into an airtight container or a freezer bag. They’ll keep in the fridge for up to three days, but I always freeze them for longer storage where they’re happy for up to three months. Reheating is a breeze in a toaster, a regular oven, or an air fryer until they’re warm and crisp again, which brings back that just-made texture beautifully.
Ingredient Substitutions
If you’re out of whole milk, any other milk you have on hand will work, though the richness might vary a bit. For gluten-free homemade waffles, just swap the all-purpose flour with your favorite one-to-one gluten-free blend. To make them dairy-free, use a non-dairy milk and replace the melted butter with a neutral oil like canola or melted vegan butter. If you need an egg-free version, a flax egg is a great substitute that still provides structure. The vanilla extract can be swapped with almond extract for a different flavor twist.
Serving Suggestions
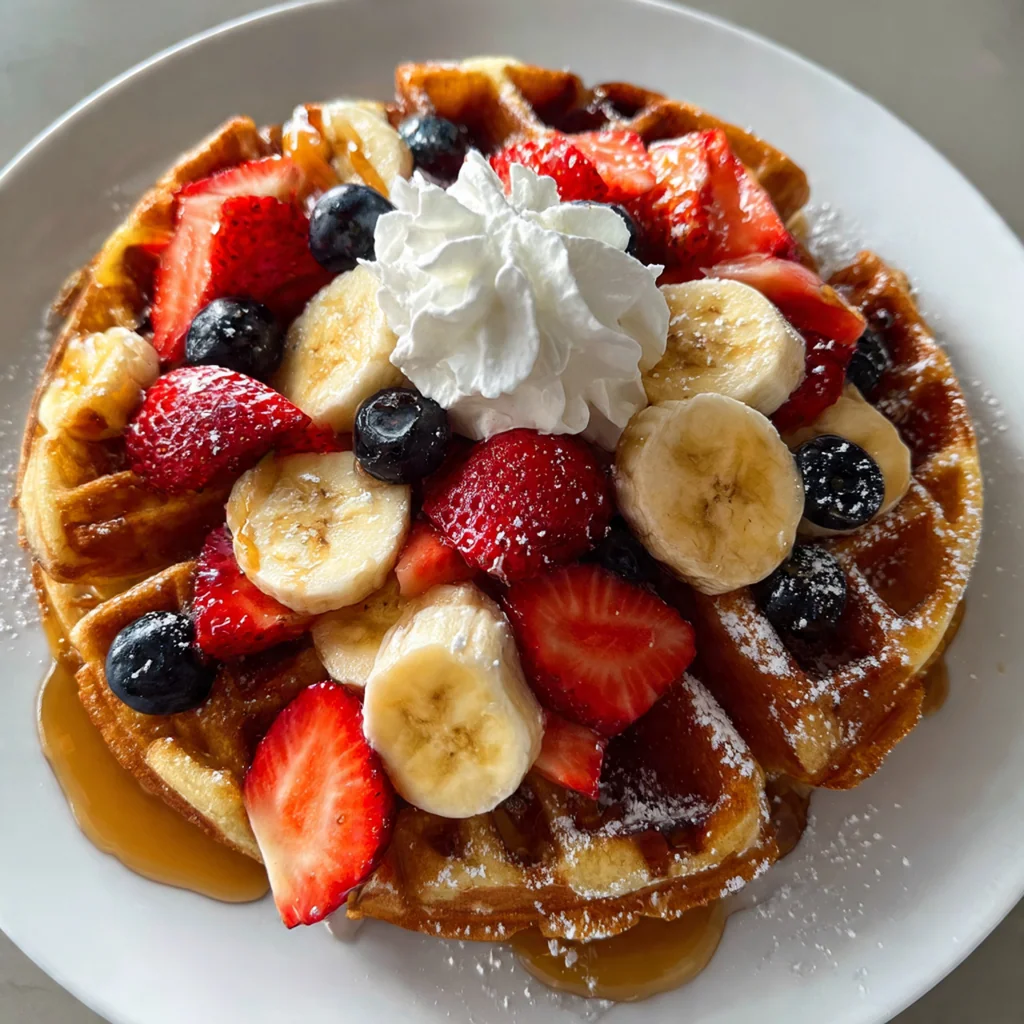
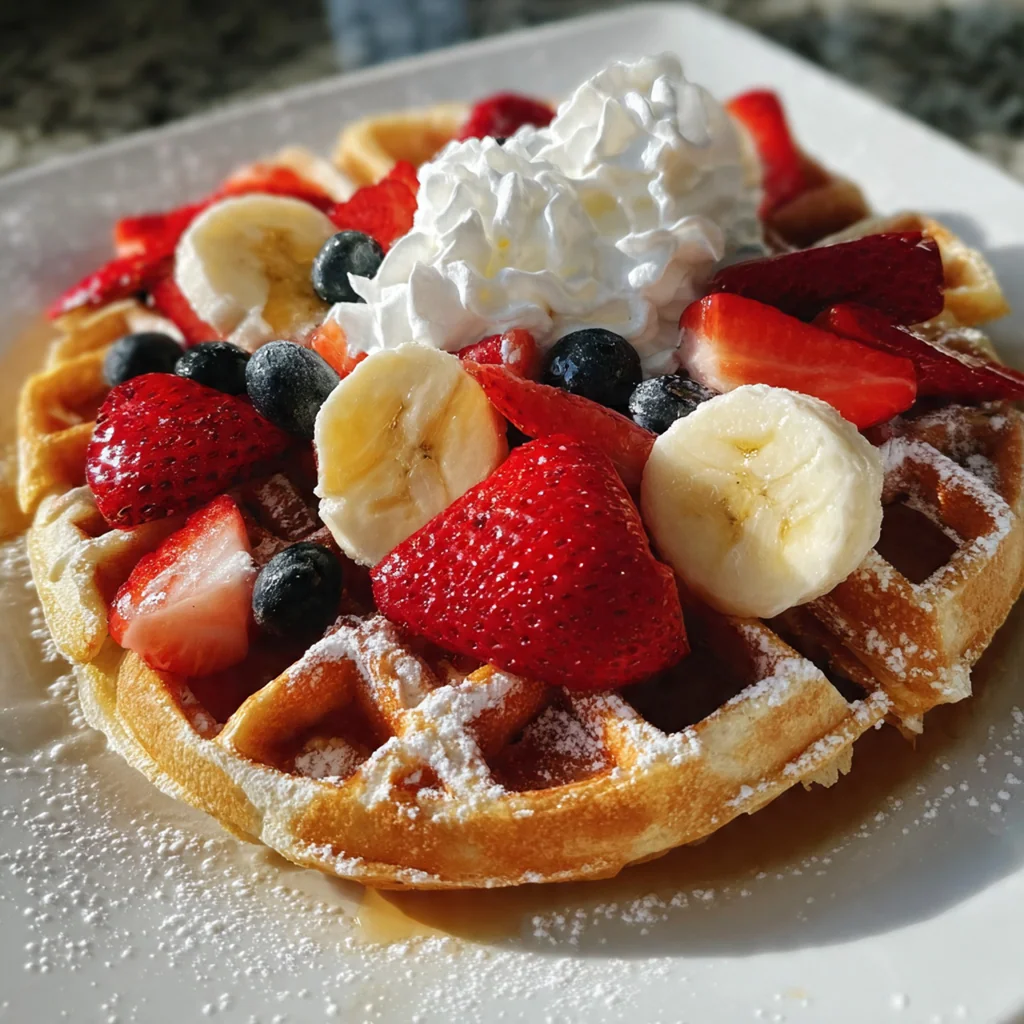
I love serving a stack of these warm homemade waffles with a generous pour of pure maple syrup and a pat of extra butter melting into all the little squares. For a special treat, scatter on some fresh berries like strawberries or blueberries and a dollop of whipped cream. To turn it into a full feast, pair them with crispy bacon, some savory sausage links, or a side of fluffy scrambled eggs. The sweet and savory combination is truly unbeatable for a weekend brunch.
Cultural Context
The waffle holds a special place in American breakfast culture, a comforting icon that’s evolved from the simple Dutch and Belgian traditions brought by immigrants. The classic homemade waffle we know today, with its signature grid pattern perfect for holding syrup, became a household staple with the invention of the electric waffle iron in the early 20th century. It transformed from a special occasion food into a weekend ritual for families everywhere. That pursuit of the perfect crisp-on-the-outside, fluffy-on-the-inside texture is a joyful cooking challenge passed down through generations.
Pro Tips
- Use a ladle or measuring cup for consistent batter amounts every time
- Keep finished waffles warm in a single layer on a rack in a 200°F oven
- If your iron isn’t non-stick, grease it lightly between each and every batch
- Fresh berries are best added directly to the batter right before pouring, not mixed in
- This little trick prevents purple batter
Frequently Asked Questions
All-purpose flour is the best choice for these waffles because it provides the ideal structure, resulting in a waffle that is crisp on the outside and tender on the inside. You can also use a combination of all-purpose and whole wheat flour for a heartier texture, but the classic version uses all-purpose.
For the best results and maximum fluffiness, it’s recommended to cook the waffles immediately after mixing the batter. However, you can prepare the dry and wet ingredients separately the night before and combine them in the morning for a quick start to your breakfast.
You can use buttermilk for a tangier, slightly thicker waffle, or any non-dairy milk like almond or oat milk. Keep in mind that the fat content in whole milk contributes to the rich flavor and crispy texture, so using a lower-fat milk may result in a less crisp waffle.
The waffles are ready when they are golden brown and crisp, and the steam has mostly stopped coming out of the waffle iron. This usually takes about 4-5 minutes, but follow your waffle iron’s instructions and check for doneness by peeking after the recommended time.
Classic toppings include pure maple syrup, butter, fresh berries, and whipped cream. For a savory twist, try serving them with fried chicken. These waffles are also delicious with a dollop of Greek yogurt and a drizzle of honey for a slightly healthier option.