

This is truly the ultimate mini cheesecake recipe, designed to give you flawless, creamy results without any of the usual stress. Say goodbye to worrying about water baths or springform pans leaking all over your oven. I developed this recipe after years of searching for a simple, reliable method that delivers that classic, rich flavor in a perfect, party-ready portion. Based on classic American cheesecake, these little desserts have a tangy, smooth filling and a buttery graham cracker crust that is simply irresistible. They prove that you don’t need complicated techniques to create a showstopping treat.
Why You'll Love This Recipe
- Absolutely no fussy water bath is required for crack-free tops
- Perfectly portioned for parties and easy serving
- Endlessly customizable with all your favorite toppings
- A buttery crisp crust with an ultra-creamy filling
- They are my go-to dessert to make ahead of time
Ingredients You’ll Need
- Graham cracker crumbs: This creates the classic, buttery, and slightly sweet base for our cheesecakes. You can buy pre-crushed crumbs or make your own by pulsing whole crackers in a food processor.
- Granulated sugar: We use this to sweeten both the crust and the filling. Its fine texture dissolves completely, ensuring a smooth, grit-free cheesecake filling that is perfectly balanced.
- Unsalted butter: Melted butter is the glue that holds our crust together, giving it a rich flavor and a firm, crisp texture after baking. Using unsalted lets you control the final seasoning.
- Cream cheese: This is the star of the show. For the best mini cheesecake recipe, you must use full-fat, block-style cream cheese that is completely softened to room temperature to avoid lumps.
- Eggs: Eggs are essential for the structure, providing richness and helping the filling set into a dense, custardy texture. Make sure they are at room temperature to incorporate smoothly.
- Sour cream: This adds a wonderful tangy flavor that cuts through the richness of the cream cheese. It also contributes to the incredibly smooth and creamy final texture.
- Pure vanilla extract: A splash of good quality vanilla enhances all the other flavors in the cheesecake, adding warmth and depth. Avoid imitation vanilla for the best, most authentic taste.
- Salt: Just a tiny pinch of salt balances the sweetness and enhances the tangy notes from the cream cheese and sour cream. It makes a huge difference in the final flavor profile.
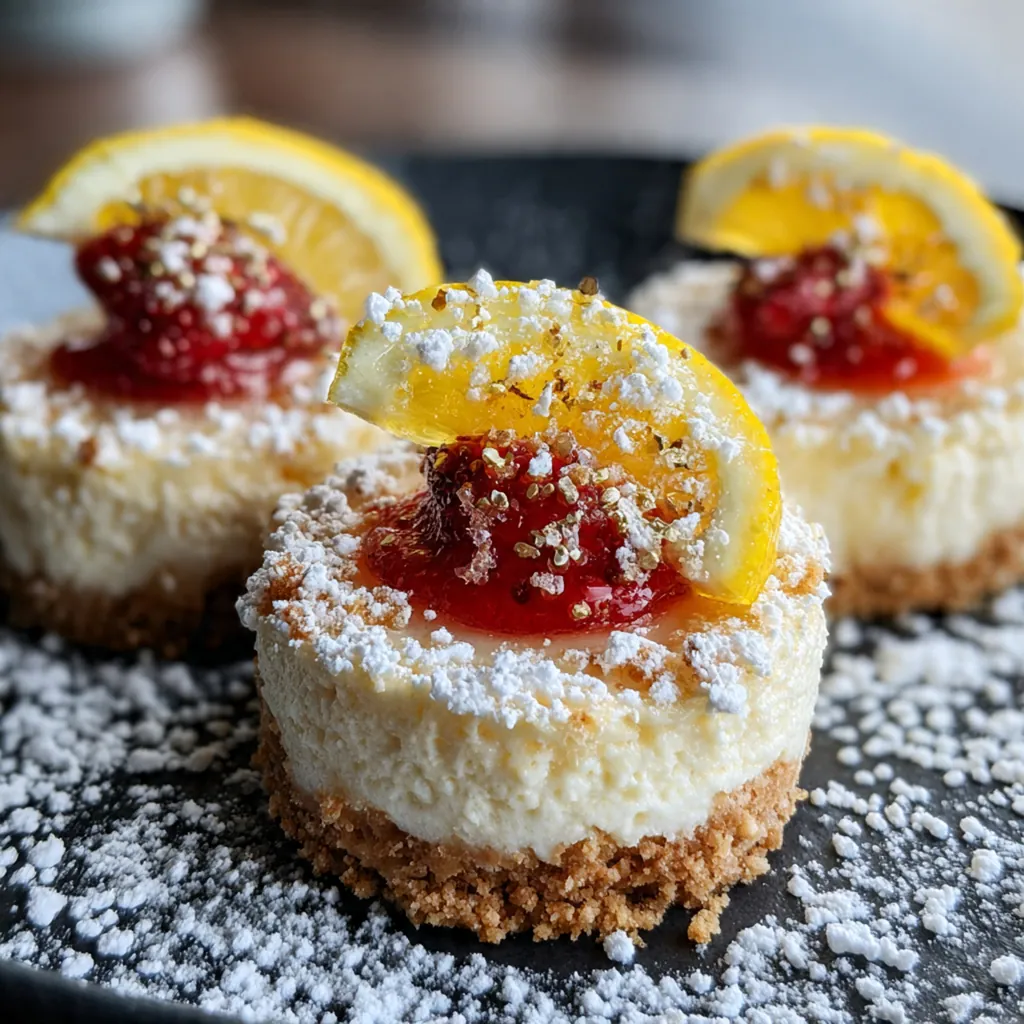
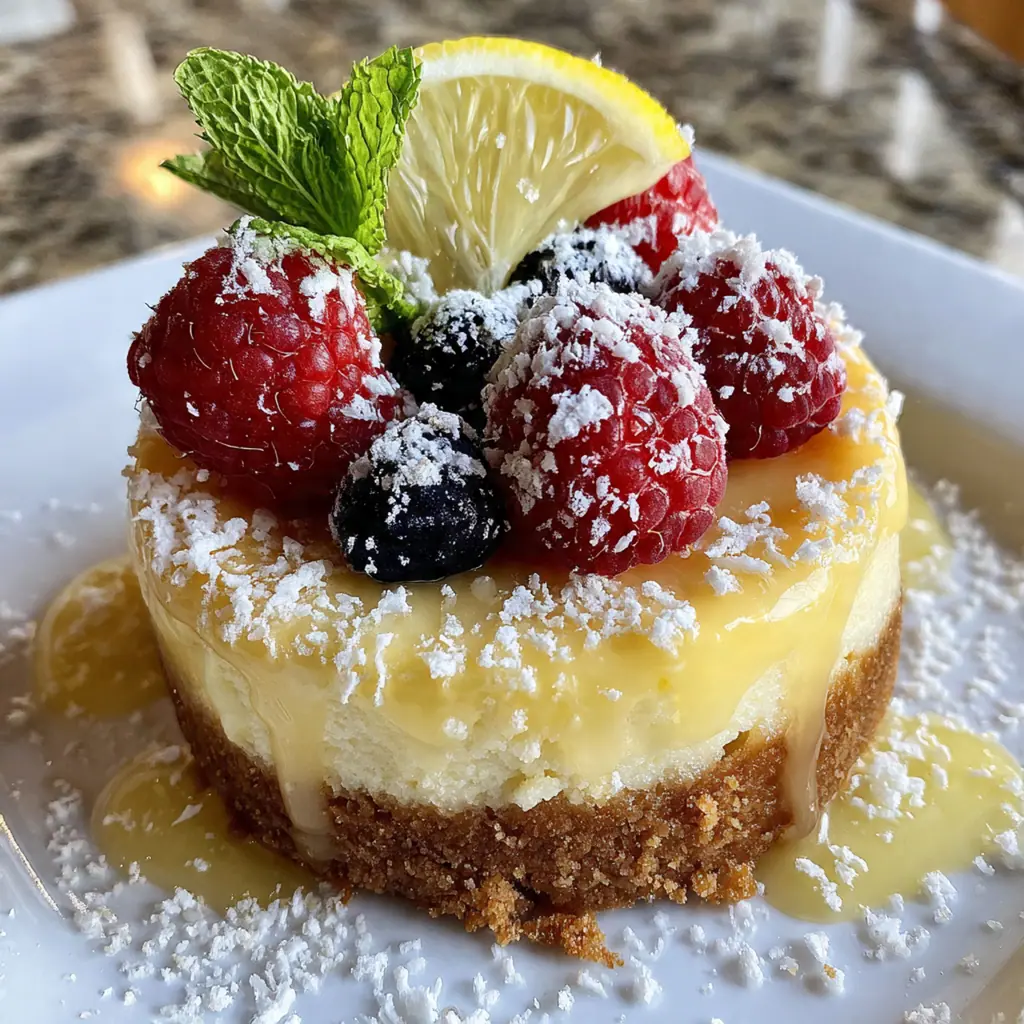
- Fresh berries: Optional but highly recommended, fresh strawberries, raspberries, or blueberries add a burst of freshness and color that contrasts beautifully with the rich cheesecake.
- Cherry or strawberry pie filling: A classic topping for a reason. A spoonful of sweet pie filling provides an instant, effortless, and traditional finish to your mini cheesecakes.
- Caramel or chocolate sauce: For a more decadent twist, a drizzle of warm caramel or rich chocolate sauce turns these simple treats into a truly indulgent dessert experience.
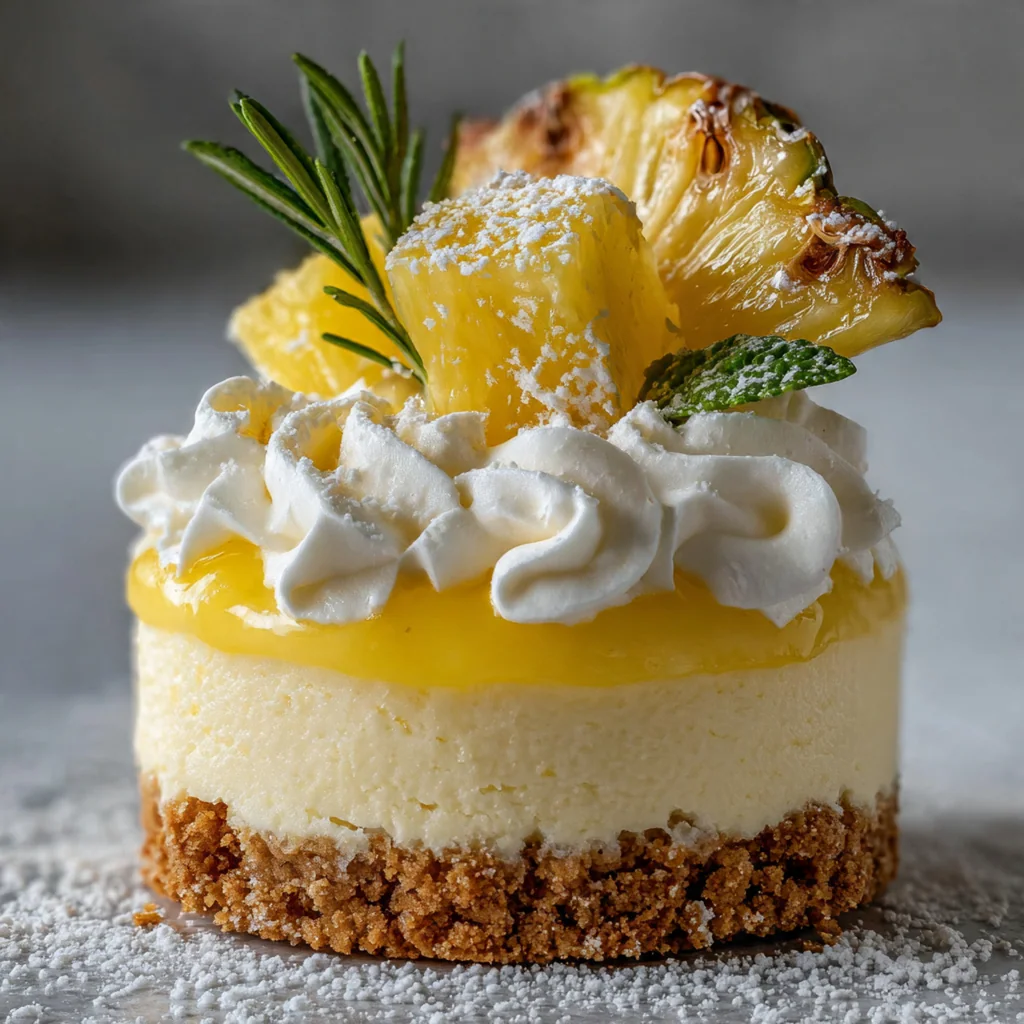
- A dollop of whipped cream: Light, airy, and simple, a swirl of whipped cream is the perfect finishing touch. It adds a lovely textural contrast without overpowering the cheesecake’s flavor.
How to Make It
Prepare the Oven and Muffin Tin:
First things first, let’s get your oven ready. Preheat it to 325°F (163°C) and make sure the rack is positioned in the middle. This moderate temperature is key to baking the cheesecakes gently, which is a major factor in preventing cracks. While the oven heats, line a standard 12-cup muffin tin with paper liners. The liners are non-negotiable, as they make it incredibly easy to remove the finished cheesecakes without any sticking or breaking. This simple prep step sets you up for success with this easy mini cheesecake recipe.
Mix and Press the Crust:
Now for that wonderful, buttery base. In a small bowl, combine your graham cracker crumbs with the 1/4 cup of granulated sugar. Give it a quick stir to distribute the sugar evenly. Next, pour in the melted unsalted butter. Use a fork to mix everything together until all the crumbs are evenly coated. The final texture should feel like damp sand, where the mixture holds together when you press it. This texture ensures your crust will be firm and not crumbly after baking.
Pre-Bake the Crusts:
This step is crucial for a crisp, sturdy crust that won’t get soggy. Spoon about 1.5 tablespoons of the graham cracker mixture into each of the 12 paper liners. You can eyeball it, but using a measuring spoon helps keep them uniform. Then, find a small glass or a spice jar with a flat bottom and use it to press the crumbs down firmly and evenly. A solid, compact base is what you’re aiming for. Bake these crusts for just 5 minutes. This quick bake sets the crust and brings out its toasty flavor. Once done, pull the tin from the oven and set it aside to cool while you prepare the filling.
Create a Silky Smooth Cream Cheese Base:
Here’s where the magic happens, and room temperature ingredients are your best friend. Place your softened block cream cheese in a large mixing bowl. Using an electric hand mixer or a stand mixer with the paddle attachment, beat the cream cheese on medium speed for a good 2-3 minutes. You want it to be completely smooth, with absolutely no lumps. Be sure to stop and scrape down the sides and bottom of the bowl a couple of times to ensure every bit gets incorporated. This step is the foundation of a perfectly creamy mini cheesecake recipe.
Add Sugar and Eggs Gently:
With the cream cheese perfectly smooth, it’s time to add the 3/4 cup of granulated sugar. Beat it in until it’s fully combined and the mixture is smooth and creamy again. Now for the most important part: adding the eggs. Add them one at a time, mixing on low speed only until the yellow yolk disappears into the batter. Do not overmix here. Overbeating eggs incorporates too much air, which causes the cheesecakes to puff up dramatically in the oven and then sink and crack as they cool. This gentle approach is your best defense against cracked tops.
Finish the Cheesecake Batter:
To finish the filling, add the sour cream, pure vanilla extract, and salt. Mix everything together on the lowest possible speed, just until it’s combined. The final batter should be thick, smooth, and luxurious. Give it one last scrape and a gentle fold with a spatula to make sure everything is incorporated from the bottom of the bowl. Resist the urge to keep mixing; a few seconds is all it takes at this stage. A perfect batter is the secret to a great mini cheesecake recipe.
Fill the Liners and Bake:
Now it’s time to bring it all together. Divide the cheesecake filling evenly among the 12 prepared crusts. The easiest way to do this without making a mess is by using a large cookie scoop or an ice cream scoop. This tool helps you portion the batter perfectly, so all your mini cheesecakes are the same size and bake evenly. Fill each liner almost to the very top. Place the muffin tin in your preheated oven and bake for 20-22 minutes. You’ll know they’re done when the edges are set, but the centers still have a very slight jiggle to them. Don’t be tempted to overbake!
Cool the Cheesecakes Gradually:
This step is our secret weapon for preventing cracks and sinking, and it replaces the need for a water bath. Once the baking time is up, simply turn off the oven. Crack the oven door open just an inch or two and leave the cheesecakes inside to cool down slowly for one full hour. This gradual temperature change allows the filling to set gently, preventing the sudden contraction that causes cracks. It’s a hands-off step that makes a world of difference in the final appearance of your mini cheesecakes.
Chill to Perfection:
After their hour-long rest in the warm oven, remove the muffin tin and place it on a wire rack to cool completely to room temperature. Don’t rush this part. Once fully cooled, cover the entire tin loosely with plastic wrap and transfer it to the refrigerator. For the best possible flavor and texture, you need to chill them for at least 4 hours, but chilling them overnight is even better. This extended chilling time allows the cheesecakes to firm up completely and lets the flavors meld together into that classic tangy, rich taste you’re looking for. This is the final step in creating the perfect mini cheesecake recipe.
You Must Know
- Room temperature ingredients are absolutely non-negotiable
- Do not overmix the batter after you add the eggs
- Letting them chill overnight is the key to the best texture
- That slow cool-down in the oven is what prevents cracks
Storage Tips
Storing your mini cheesecakes properly is so easy and keeps them fresh for days. Once they are fully chilled, you can keep them right in the muffin tin, covered, or transfer them to an airtight container. They will stay perfectly fresh in the refrigerator for up to 5 days, making them a fantastic make-ahead dessert. If you want to store them for longer, they freeze beautifully for up to 3 months. To freeze, place the cheesecakes on a baking sheet in the freezer until they are solid. Then, wrap each one individually in plastic wrap before placing them all in a freezer-safe bag. To enjoy, just thaw them in the refrigerator for a few hours before serving.
Ingredient Substitutions
While this mini cheesecake recipe is classic, there are a few simple swaps you can make. If you need a gluten-free version, simply substitute the graham cracker crumbs with your favorite gluten-free graham-style crumbs. A crust made from crushed almonds or pecans mixed with butter is also a fantastic alternative. If you don’t have sour cream, you can use full-fat plain Greek yogurt in a pinch; it will provide a similar tangy flavor and creamy texture. For the crust, you could also experiment with crushed vanilla wafers or even shortbread cookies for a slightly different flavor profile that pairs wonderfully with the creamy filling.
Serving Suggestions
The best part about these mini cheesecakes is dressing them up for serving. They are a perfect blank canvas! You can serve them chilled, straight from the fridge, for a simple and elegant treat. For a classic look, top each one with a spoonful of cherry or strawberry pie filling. Fresh berries, like a single perfect raspberry or a few sliced strawberries, add a beautiful pop of color and freshness. For something a bit more indulgent, a drizzle of warm caramel or chocolate sauce is always a winner. And you can never go wrong with a simple, generous dollop of freshly whipped cream just before you serve them.
Cultural Context
Cheesecake itself has ancient roots, but the creamy, rich version we know and love today is a distinctly American creation, perfected in New York in the early 20th century. That classic New York style, known for its dense and smooth texture from cream cheese, is the direct inspiration for this mini cheesecake recipe. The idea of making them ‘mini’ is a more modern evolution, driven by the American love for convenience, portion control, and party-friendly foods. Turning a large, often intimidating dessert into an easy-to-make, single-serving treat captures the spirit of modern home baking. It takes the elegance of a classic dessert and makes it accessible for any occasion, from a holiday gathering to a simple weeknight indulgence. This mini cheesecake recipe embodies that perfect blend of timeless flavor and contemporary ease.
Pro Tips
- Use full-fat, block-style cream cheese, not the whipped kind
- Scrape the bowl often to ensure no lumps are left behind
- A cookie scoop gives you perfectly uniform cheesecakes
- Chilling overnight really makes a huge difference in flavor
Frequently Asked Questions
For the creamiest texture in this mini cheesecake recipe, it’s essential to use full-fat, block-style cream cheese. Avoid whipped or low-fat cream cheese spreads, as they contain more air and water, which can make your cheesecakes runny and prevent them from setting up properly. Make sure the cream cheese is at room temperature before you start mixing to ensure a smooth, lump-free batter.
Absolutely! These mini cheesecakes are perfect for making ahead. Once they’ve cooled completely, you can store them in an airtight container in the refrigerator for up to 4-5 days. For longer storage, you can freeze them for up to 2 months. Just be sure to thaw them in the refrigerator overnight before serving. It’s best to add any toppings right before you serve them.
If you don’t have graham crackers, you have several great options for the crust in this mini cheesecake recipe. You can easily substitute an equal amount of crushed vanilla wafers, Biscoff cookies, or even shortbread cookies. For a gluten-free option, use crushed gluten-free vanilla cookies or a nut-based crust made from almond flour, butter, and a little sugar.
You’ll know the mini cheesecakes are done baking when the edges are set and the centers still have a slight jiggle, almost like Jell-O. They shouldn’t be completely firm. They will continue to set as they cool. Over-baking is a common cause of cracks, so pull them out after about 22 minutes, even if the center looks a little soft. They will firm up perfectly in the fridge.
These classic American-style mini cheesecakes are incredibly versatile. You can serve them plain or with a variety of toppings. Popular choices include a dollop of cherry or strawberry pie filling, a drizzle of chocolate or caramel sauce, or a swirl of whipped cream and fresh berries. For a simple and elegant touch, a light dusting of powdered sugar also works beautifully.