

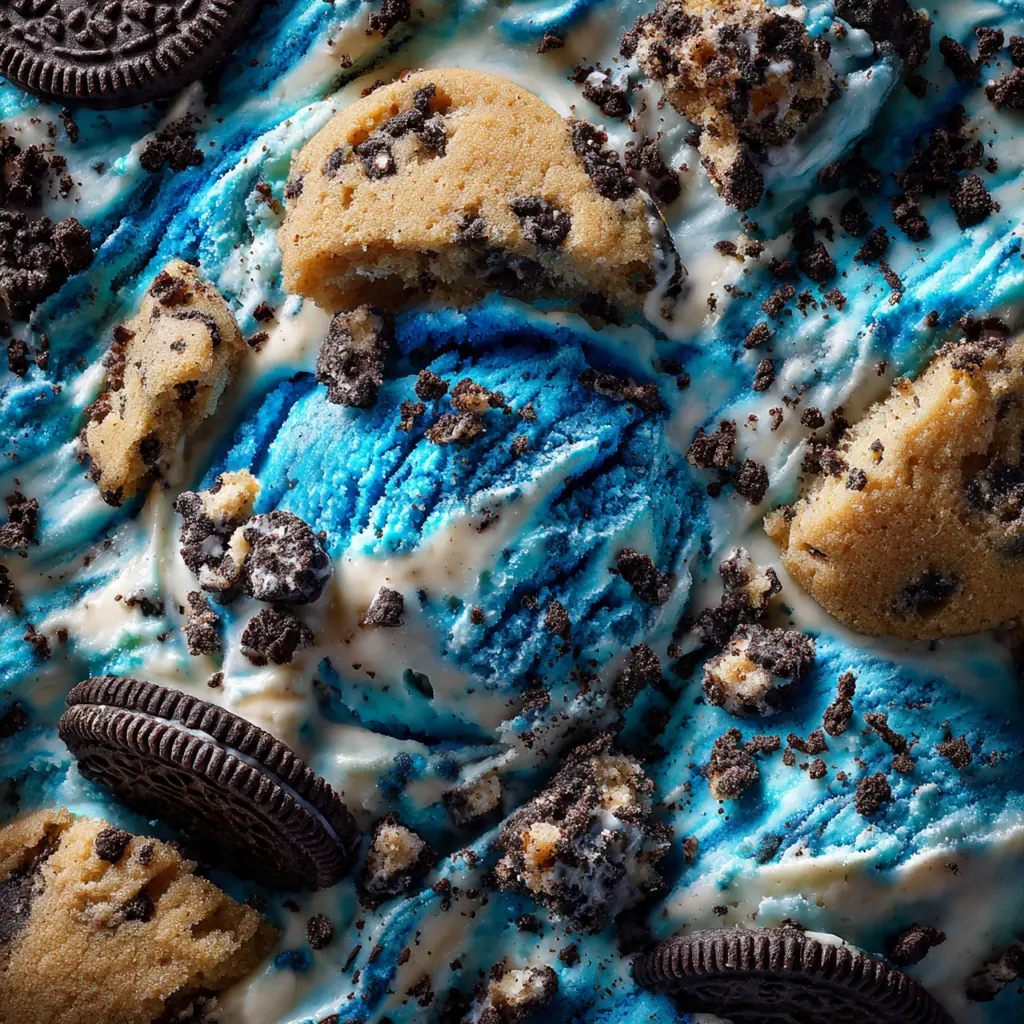
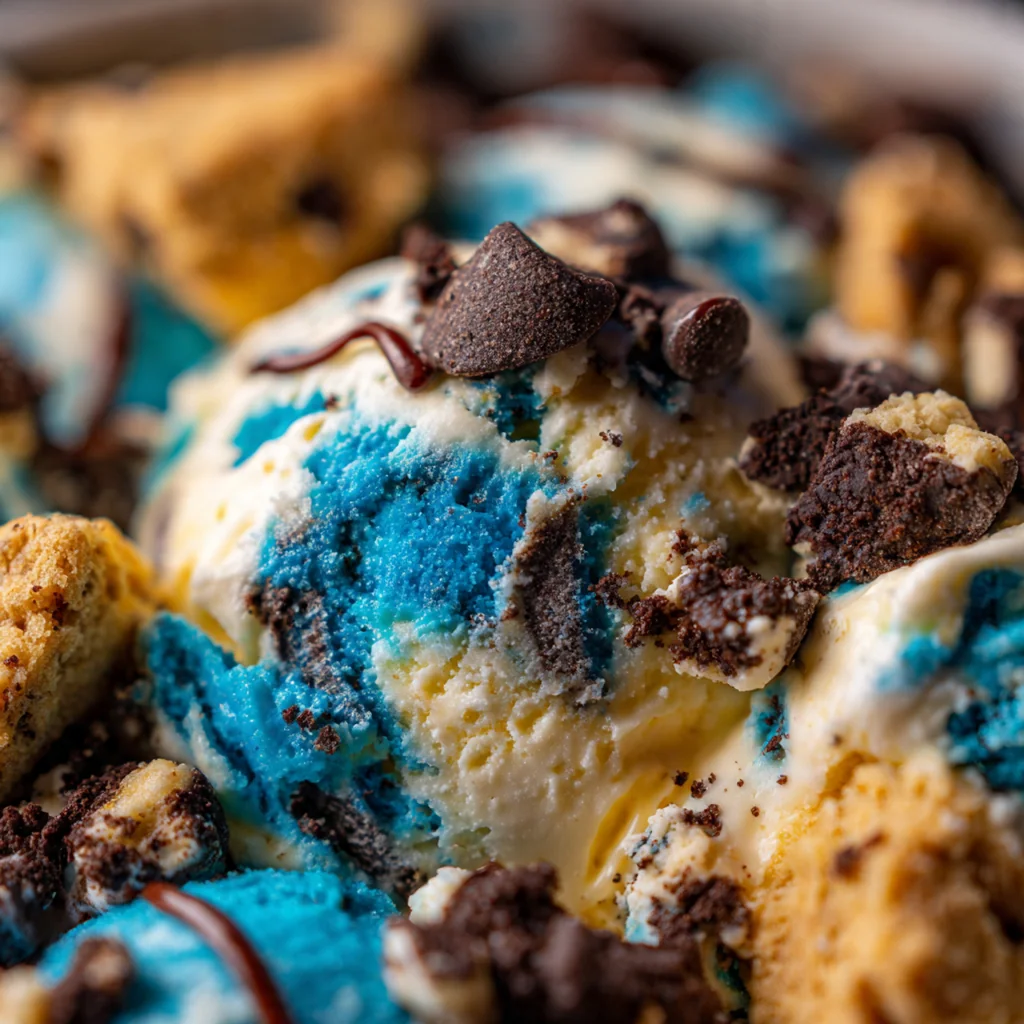
This Cookie Monster ice cream is a vibrant, playful dessert that instantly brings back childhood memories of everyone’s favorite cookie-loving monster. It’s a rich, homemade custard base dyed a brilliant blue and loaded with two kinds of cookie chunks for maximum fun and flavor. As an American frozen treat, it’s perfect for birthdays, parties, or just making an ordinary day feel special. You’ll love how the creamy texture and cookie-packed bites come together in every scoop.
Why You'll Love This Recipe
- A show-stopping dessert that’s the hit of every party or playdate
- The creamy custard base is packed with double the cookie flavor
- The vibrant blue color is instantly exciting for kids and kids-at-heart
- You can use your favorite store-bought or homemade cookie dough
- Making it from scratch is rewarding and tastes far better than store-bought
Ingredients You’ll Need
- Heavy cream: for that luxurious, rich, and creamy texture that’s the hallmark of premium homemade ice cream.
- Whole milk: balances the heavy cream with a lighter fat content for the perfect scoopable consistency.
- Granulated sugar: divided use ensures the custard is perfectly sweetened and the egg yolks are properly stabilized.
- Large egg yolks: create a smooth, velvety custard base that freezes with a beautifully dense and creamy body.
- Salt: a tiny pinch enhances all the other flavors and balances the sweetness perfectly.
- Vanilla extract: adds a warm, familiar background note that complements the cookie flavors without overpowering them.
- Blue gel food coloring: gives that iconic vibrant hue without watering down your custard like liquid coloring would.
- Chocolate chip cookie dough pieces: use chilled store-bought dough for convenience or your favorite homemade recipe for a personal touch.
- Crushed chocolate sandwich cookies: add a wonderful crunch and a second layer of chocolatey, cookie goodness.
- Additional whole chocolate chip cookies: perfect for serving as an edible garnish or a fun side.
- Edible candy eyes: the final playful touch that brings your Cookie Monster creation to life.
How to Make It
Heat the Cream Base:
In a medium saucepan, combine the heavy cream, whole milk, and half of the sugar. Heat it over medium until you see steam and small bubbles form around the edges, which takes about five minutes. You don’t want it to boil, just get nice and hot.
Whisk the Egg Yolks:
While the cream heats, grab a medium bowl and whisk together the egg yolks, the rest of the sugar, and the salt. Keep whisking for two to three minutes until the mixture turns pale, thickens noticeably, and falls from the whisk in thick ribbons.
Temper the Egg Mixture:
This crucial step prevents scrambled eggs in your ice cream. Slowly pour about one cup of the hot cream into the egg yolks in a thin stream while you whisk constantly. It gently raises the temperature of the eggs.
Cook the Custard:
Pour the tempered yolk mixture back into the saucepan with the remaining cream. Cook over low heat, stirring constantly with a wooden spoon, until it thickens enough to coat the spoon’s back and reaches 170°F. This usually takes five to seven minutes of patient stirring.
Add Flavor and Color:
Take the pan off the heat immediately. Stir in the vanilla extract and your blue gel food coloring, starting with half a teaspoon and adding more until you achieve that deep, iconic Cookie Monster blue you’re after.
Strain and Chill:
Pour the custard through a fine-mesh sieve into a clean bowl to catch any little bits of cooked egg. Press plastic wrap directly onto the surface to prevent a skin, then refrigerate for at least four hours or, ideally, overnight until it’s completely cold.
Churn the Ice Cream:
Pour your thoroughly chilled custard into the bowl of your ice cream maker. Churn it according to the manufacturer’s directions until it reaches a soft-serve consistency, which typically takes twenty to twenty-five minutes.
Incorporate the Mix-Ins:
In the last two minutes of churning, add your chilled cookie dough pieces and crushed sandwich cookies through the machine’s opening. Let the machine mix them in evenly so every scoop is packed with goodies.
Freeze to Firm Up:
Transfer the churned ice cream to a freezer-safe container. Smooth the top, then press a piece of parchment paper directly onto the surface before sealing with the lid. Freeze for at least four hours until it’s firm enough to scoop beautifully.
You Must Know
- A completely cold custard base is non-negotiable for the creamiest texture
- Gel food coloring gives a vibrant blue without diluting your mix
- Chill your cookie dough pieces so they stay distinct chunks
- If you don’t have a machine, freeze and stir in a pan
- That parchment paper pressed on top is your secret against icy crystals
Storage Tips
Store your Cookie Monster ice cream in an airtight container in the freezer, and it’ll keep its best quality for up to two weeks. To serve, let it sit at room temperature for five to ten minutes to soften just enough for easy scooping. If you notice any ice crystals forming on the surface over time, just give the top a quick smooth-over with the back of a spoon before resealing the container. I always press a fresh piece of parchment onto the surface every time I put it back, which is my trick for keeping it perfect.
Ingredient Substitutions
If you’re out of heavy cream, you can try using half-and-half for a slightly lighter version, though the ice cream won’t be as rich. For a dairy-free alternative, full-fat coconut milk can work for both the cream and milk, but expect a subtle coconut flavor. Don’t have gel coloring? You can use liquid, but you’ll need quite a bit more to get that vibrant blue. Any crunchy chocolate cookie works in place of sandwich cookies, and you can swap the chocolate chip cookie dough for brownie bites or even pieces of your favorite candy bar. I’ve used gluten-free cookies and dough with great success for friends with dietary needs.
Serving Suggestions
Serve this ice cream in classic waffle cones or colorful bowls for the ultimate fun presentation. For a party, create a sundae bar with rainbow sprinkles, hot fudge, whipped cream, and maraschino cherries so guests can build their own monster masterpieces. It’s also fantastic sandwiched between two large chocolate chip cookies for an over-the-top ice cream sandwich. I love setting out small bowls of extra crushed cookies and candy eyes so everyone can decorate their own scoop just the way they like it.
Cultural Context
While Cookie Monster himself is a beloved icon of American children’s television from Sesame Street, the act of making colorful, character-inspired treats taps into a broader tradition of fun food. This style of playful, over-the-top dessert is a hallmark of American party culture, where birthdays and celebrations are often centered around themed sweets that are as much about visual appeal as taste. Homemade ice cream has deep roots in American culinary history, and adding mix-ins like cookies reflects the modern love for loaded, texture-filled desserts. It’s a recipe that prioritizes joy and nostalgia, turning a simple frozen custard into an edible experience that sparks smiles and shared memories.

Pro Tips
- Chill your ice cream maker’s bowl for a full 24 hours if possible
- Use a kitchen scale to measure your cookie dough for even chunks
- Temper your eggs slowly to avoid any graininess in the custard
- Let the machine do the work of mixing in the cookies
- My family fights over who gets the scoop with the candy eyes
Frequently Asked Questions
For a similar rich texture, you can use full-fat coconut cream as a direct 1:1 substitute. However, the flavor will be slightly different. Avoid lower-fat milk or cream, as they won’t whip and freeze properly, resulting in an icy texture instead of creamy Cookie Monster ice cream.
Absolutely! This is an ideal make-ahead dessert. Once churned, store your Cookie Monster ice cream in an airtight container in the freezer for up to 2 weeks. Let it sit at room temperature for 5-10 minutes before scooping for the perfect creamy texture.
If you don’t have gel coloring, you can use natural alternatives like butterfly pea flower powder, though the color will be more muted. Start with a teaspoon, steep it in the warm milk, and strain. Avoid liquid food coloring, as you’d need too much and it can thin the base.
The base is done when it thickens enough to coat the back of a spoon. Run your finger through it; if the line holds without the custard dripping, it’s ready. This usually takes 5-8 minutes of constant stirring over medium-low heat. Don’t let it boil.
Serve scoops in bowls or cones for a classic treat. For a party, make an epic sundae bar with extra crushed cookies, mini chocolate chips, whipped cream, and a cherry on top. It pairs wonderfully with a simple glass of cold milk or a warm brownie.